Author Archives: ridrix

How to enable PC/SC support for Dell Contactless Reader

Finally I found the solution!

In a follow up to my post on the “Dell embedded contactless reader“, here is how you enable PC/SC support for this reader.

Select Dell Latitude and Precision systems comes with an embedded contactless smart card reader. Out of the box, this reader is not PC/SC enabled. The contactless reader is only available through the CV chipset (Dell Credentials Vault), meaning that it will only work in PBA (Pre Boot Authentication), and when enrolling a contactless card through the Dell supported software (EmbassySuite/ControlPoint).

PC/SC support means that you can use this reader in your own and third-party programs, by using the standard PC/SC smartcard API.
I have contacted Dell about PC/SC support for the contactless reader, but they could not provide me with any information (they barely knew what PC/SC was).
After some frustration, I started searching through the installed files (Broadcom/Wave Systems), and I finally found the solution.

There is a utility called “ushradiomode64.exe” in the folder “c:\Program Files\Broadcom Corporation\Broadcom USH Host Components\CV\bin”.

This utility takes 1 parameter, namely the operation mode of the Contactless Reader Radio:

Example to Enable CV Only Radio Mode:
  ushradiomode -c

Example to Enable Normal Radio Mode:
  ushradiomode -n

“CV Only Radio Mode” is the default mode, and in this mode the reader is only available to the CV/PBA. In “Normal Radio Mode”, the reader becomes visible in Device Manager, and can be found when enumerating the PC/SC terminals attached to the system.

Here is how you enable “normal” mode (meaning that the reader will now become listed under “Smart card readers” in Device Manager):

  1. Make sure you have installed the latest version of the “Dell ControlPoint Security Device Driver Pack” from http://support.dell.com. (Latest version as of 2009-10-09 is v1.1.30 A07)
  2. Open command prompt:
    Start -> Run -> cmd.exe
  3. Type the following 2 commands:
     cd c:\Program Files\Broadcom Corporation\Broadcom USH Host Components\CV\bin ushradiomode64.exe -n 
  4. reboot (to make windows load the PC/SC driver)

When the system starts up again, check Device Manager and confirm that there are now 2 entries under “Smart card readers”, both called “USB Smart Card Reader”. (1 for the Contactless and 1 for the Contacted smartcard reader).

I haven’t tested many cards yet, only retrieved the ATR* from a 1k Mifare Classic Card.

(* Note that contactless cards don’t have ATRs. The ATR is this case is generated by the reader or PC/SC driver for the reader. Using the ATR here is just a simple way to check that the reader at least can detect the contactless card.)

If you find time to play around with this reader through PC/SC, please let me know by posting a comment below. What cards did you test? Did everything work as expected?


t:kort public transportation card explorations

In a follow up to my DESFire communication example post, here is a brief explanation of what you can find on the “t:kort“.

The “t:kort” is a public transportation card used in the county of “Sør-Trøndelag” in Norway. The card is a Mifare DESFire contactless smartcard, and the data stored on the card follows the NORTIC Specification for Mifare DESFire (NSD) (Statens Vegvesen – Håndbok 206 Elektronisk billettering (2004/05) page 218 )

Some commands do not require authentication, but read/write access to the files in the Transport directory requires the use of key #7, which is not public.

Note: DESFire uses LSBF (Least Significant Byte First).

Here I’ll show the data that is public (does not require auth), and briefly explain what they mean.

General DESFire stuff:

File types:
0x00 = Standard Data Files
0x01 = Backup Data Files
0x02 = Value Files with Backup
0x03 = Linear Record Files with Backup
0x04 = Cyclic Record Files with Backup
Communication mode:
0x00 = Plain communication
0x01 = Plain communication secured by DES/3DES MACing
0x03 = Fully DES/3DES enciphered communication
Communication flow:
--> To card
<-- From card

Communication with a virgin t:kort:

Get Version:
--> 60
<-- af 04 01 01 00 02 18 05
--> af
<-- af 04 01 01 00 06 18 05
--> af
<-- 00 XX XX XX XX XX XX XX ZZ ZZ ZZ ZZ ZZ 29 08

The GetVersion command returns manufacturing data about the PICC (chip).
04 = Vendor id (Philips)
Hardware version is 0.2 (00 02), and storage size is 18 (4096 bytes).
Software version is 0.6 (00 06), and storage size is 18 (4096 bytes)
The X’s are the 7-byte UID
The Z’s are the 5-byte batch number
29 = Calendar week of production
08 = Production year

Get Application IDs:
--> 6a
<-- 00 00 80 57 01 80 57

2 Applications available: 00 80 57 and 01 80 57
57 80 00 is the NORTIC Card Issuer DF (Directory File)
57 80 01 is the NORTIC Transport DF

Select Application 00 80 57:
--> 5a 00 80 57
<-- 00

OK

Get Key Settings for application master key (AID 00 80 57):
--> 45
<-- 00 12 04

12 = configuration not changeable, no free create/delete file, free directory list, master key not changeable, other key changeable using key # 1
04 = number of 3DES keys : 4 (Master key (M, #0), card Issuer key (I, #1), Card retailer key (C,#2), and Read key (R, #3).

Iterating the Get Key Version command shows that keys 00-03 are available.
All other key IDs return 0x40 (No Such Key)

Get Key Version key 00 (AID 00 80 57):
--> 64 00
<-- 00 1d
Get Key Version key 01 (AID 00 80 57):
--> 64 01
<-- 00 1d
Get Key Version key 02 (AID 00 80 57):
--> 64 02
<-- 00 1d
Get Key Version key 03 (AID 00 80 57):
--> 64 03
<-- 00 fb
Get File IDs (AID 00 80 57):
--> 6f
<-- 00 0c

File ID 0c = CI_Header (Card Issuer Header)
This file is created during the personalization process and is never written to during normal process.

Get File Settings for file 0c (AID 00 80 57):
--> f5 0c
<-- 00 00 00 f1 ef 10 00 00

00 = Standard Data file
00 = Plain Communication
f1 ef = read is free, write disabled, r/w disabled, Change Config with key #1
10 00 00 = length 0x10 (16 bytes)

Read Data in file 0c (AID 00 80 57):
--> bd 0c 00 00 00 10 00 00
<-- 00 90 80 00 02 XX XX XX XX 6c 68 00 28 00 02 80 40

First 10 bits = 578 (ISO country code Norway)
Next 20 bits = Format (0)
Next 2 bits = 2 (choice bitmap = cardIDNumber32bits)
Next 32 bits = Application wide unique serial number, set up at prepersonalization (denoted as ‘X’ here). This number can be found on the surface of the card printed in decimal form.
Next 14 bits = cardValidityEndDate. Card is valid until Dec 31st 2015 (Number of days since 1997-01-01 = 6938)
Next 20 bits = 160 (Application Owner Company ID)
Next 20 bits = 160 (Retailer Organisation ID)
Next 4 bits = cardKeyVersion = 1 (Used to identify which keys are in use. Initial = 1)
Last 6 bits = Not used

Select Application 01 80 57:
--> 5a 01 80 57
<-- 00

OK

Get Key Settings application master key (AID 01 80 57):
--> 45
<-- 00 12 08

12 = configuration not changeable, no free create/delete file, free directory list, master key not changeable, other key changeable using key # 1
08 = number of 3DES keys : 8 (Master key (M, #0), application Owner/issuer key (O, #1), Application retailer key (A, #2), Card retailer key (C, #3), Product retailers key (P, #4), add-Value key (V,#5), Service providers key (S, #6) and Read key (R, #7)).

Iterating the Get Key Version command shows that keys 00-07 are available.
All other key IDs return 0x40 (No Such Key)

Get Key Version key 00 (AID 01 80 57):
--> 64 00
<-- 00 1d
Get Key Version key 01 (AID 01 80 57):
--> 64 01
<-- 00 1d
Get Key Version key 02 (AID 01 80 57):
--> 64 02
<-- 00 1d
Get Key Version key 03 (AID 01 80 57):
--> 64 03
<-- 00 1d
Get Key Version key 04 (AID 01 80 57):
--> 64 04
<-- 00 76
Get Key Version key 05 (AID 01 80 57):
--> 64 05
<-- 00 94
Get Key Version key 06 (AID 01 80 57):
--> 64 06
<-- 00 25
Get Key Version key 07 (AID 01 80 57):
--> 64 07
<-- 00 fb
Get File IDs (AID 01 80 57):
--> 6f
<-- 00 01 02 03 04 05 06 0a 0c

8 files available
01 = T_ProductRetailer file
02 = T_ServiceProvider file
03 = T_SpecialEvent File
04 = T_StoredValue file
05 = T_GeneralEventLog file
06 = T_SVReloadLog file
0a = T_Environment file
0c = T_cardHolder file

Get File Settings for file 01 (AID 01 80 57):
--> f5 01
<-- 00 01 01 41 7f 80 01 00

01 = Backup data file
01 = Plain communication with MAC
41 7f = Access bits (Read with key #7, Write disabled, R/W with key#4, Change settings with Key #1)
80 01 00 = File size (0x180 = 384 bytes)

Get File Settings for file 02 (AID 01 80 57):
--> f5 02
<-- 00 01 01 41 76 80 00 00

01 = Backup data file
01 = Plain communication with MAC
41 76 = Access bits (Read with key #7, Write with key #6, R/W with key#4, Change settings with Key #1)
80 00 00 = File size (0x80 = 128 bytes)

Get File Settings for file 03 (AID 01 80 57):
--> f5 03
<-- 00 01 01 41 76 20 01 00

01 = Backup data file
01 = Plain communication with MAC
41 76 = Access bits (Read with key #7, Write with key #6, R/W with key#4, Change settings with Key #1)
20 01 00 = File size (0x120 = 288 bytes)

Get File Settings for file 04 (AID 01 80 57):
--> f5 04
<-- 00 02 01 51 7f 00 00 00 00 ff ff ff 7f 00 00 00 00 00

02 = Value File with Backup
01 = Plain communication with MAC
51 7f = Access bits (Read with key #7, Write disabled, R/W with key #5, Change settings with key #1)
00 00 00 00 = Lower limit
ff ff ff 7f = Upper limit (7fffffff)
00 00 00 00 = Limited credit value
00 = limited credit disabled

Get File Settings for file 05 (AID 01 80 57):
--> f5 05
<-- 00 04 00 f1 76 24 00 00 09 00 00 08 00 00

04 = Cyclic Record File with Backup
00 = Plain communication
f1 76 = Access bits (Read with key #7, Write with key #6, R/W disabled, Change settings with key #1)
24 00 00 = Record size (0x24 = 36 bytes)
09 00 00 = Max number of record (9)
08 00 00 = Current number of records (8)

Get File Settings for file 06 (AID 01 80 57):
--> f5 06
<-- 00 04 00 f1 75 20 00 00 03 00 00 02 00 00

04 = Cyclic Record File with Backup
00 = Plain communication
f1 75 = Access bits (Read with key #7, Write with key #5, R/W disabled, Change settings with key #1)
20 00 00 = Record size (0x20 = 32 bytes)
03 00 00 = Max number of record (3)
02 00 00 = Current number of records (2)

Get File Settings for file 0a (AID 01 80 57):
--> f5 0a
<-- 00 00 00 21 7f 20 00 00

00 = Standard Data File
00 = Plain communication
21 7f = Access bits (Read with key #7, Write disabled, R/W with key#2, Change settings with Key #1)
20 00 00 = File size (0x20 = 32 bytes)

Get File Settings for file 0c (AID 01 80 57):
--> f5 0c
<-- 00 00 00 31 7f 20 00 00

00 = Standard Data File
00 = Plain communication
31 7f = Access bits (Read with key #7, Write disabled, R/W with key#3, Change settings with Key #1)
20 00 00 = File size (0x20 = 32 bytes)

Select PICC Application:
--> 5a 00 00 00
<-- 00

OK

Get Key Settings (for PICC Application):
--> 45
<-- 00 0b 01

0b = configuration changeable, no free create/delete file, free directory list, master key changeable
01 = Only 1 key can exist for this application (the PICC application)

Get Key Version for key 00 (for PICC Application):
--> 64 00
<-- 00 1d

The PICC master key version is 0x1d

That’s all we can read from the card without knowing the read key for the Transport DF (Key #7).


Mifare Desfire communication example

MiFare DESFire are iso14443A compliant contactless smartcards, and support all layers including iso14443-4. These cards are so-called “stored value” cards, so you cannot install and execute your own program code on DESFire cards. DESFire is like a memory card with access control.

Typical usage is within public transportation and access control.

DESFire cards are considered secure. Even though there are some theoretical security flaws, no public working hack has been published like there has been for Mifare classic (standard) cards. (The new DESFire EV1 cards are supposed to address the flaws found in v0.6).

Depending on the version of the card, a DESFire card might support commands in native, native-wrapped or iso7816-4 command set styles.

  • Software version v0.4 does not support APDU (only native commands)
  • v0.5 adds support for wrapping native commands inside ISO 7816 style APDUs
  • v0.6 adds ISO/IEC 7816 command set compatibility. 

 New versions of DESFire cards (EV1) (v1.3) support extended APDU commands.

“Application” in DESFire terms is more like a DF (Directory File) in iso7816. DESFire AIDs (Application IDs) are 3 bytes long.

The command style of the first command determines the mode for the rest of the session. You cannot mix different command modes in the same session.

First, lets look at Native command mode.

Native Command mode:

Most of these commands are one byte long, and the card responds with “statusbyte + [optional data]”

Statusbyte examples:
00 : Command successful
af : More data (send command 'af' to fetch remaining data)
9d : Permission Denied
Communication flow:
--> To card
<-- From card

Example using a blank DESFire v0.6 card:

Get Version:
--> 60
<-- af 04 01 01 00 02 18 05
--> af
<-- af 04 01 01 00 06 18 05
--> af
<-- 00 XX XX XX XX XX XX XX ZZ ZZ ZZ ZZ ZZ 05 06

The first response denotes the hardware releated data: version is 0.2 (00 02), and storage size is 18 (4096 bytes)
The second response denotes the software releated data: version is 0.6 (00 06), and storage size is 18 (4096 bytes)
The X’s are the 7-byte UID
The Z’s are the 5-byte batch number
05 = Calendar week of production
06 = Production year

Get Application IDs:
--> 6a
<-- 00

No applications available (blank card)

Select PICC Application:
--> 5a 00 00 00
<-- 00

OK

Get File IDs (for PICC Application):
--> 6f
<-- 9d

Permission denied.

Get Key Settings (for PICC Application):
--> 45
<-- 00 0f 01

0f = All bits in the lower nibble are set, meaning configuration can be changed, CreateApplication/GetApplicationIDs/GetKeySettings can be performed without master key, and master key is changeable
01 = Only 1 key can exist for this application (the PICC application)

Get Key Version for key 00 (for PICC Application):
--> 64 00
<-- 00 00

The PICC master key version is 0x00

Authentication with key 00 (for PICC Application):
--> 0a 00
<-- af a2 be cd 03 d8 46 cb 33
--> af b0 cc bc ed 8f c8 38 c9 08 dc e2 4d 86 ca ec 3c
<-- 00 76 73 d9 49 71 3f f2 d1

This example only showed authentication with the PICC application. In a real world transaction, you would typicall select a specific AID (!= 00 00 00), authenticate, and then read/write to files within that application.

After a successful authentication, further communication with the card is done in plain/plain+MAC/encrypted+MAC, depending on the access bits for the particular file.
Authentication is done using DES or Triple-DES, depending on keysize. If key is 8 bytes: Single DES. If key is 16 bytes, and the first 8 bytes of the key are different from the last 8 bytes: Triple-DES. The card terminal (PCD) always use DECRYPT_MODE (both when recieving and sending encrypted data), and the card always uses ENCRYPT_MODE. However, the DESFire crypto is a bit different from the normal DES/CBC scheme: The PCD uses DES “send mode” when sending data (xor before DES), and the card uses DES “recieve mode” when recieving data (xor after DES). But when the PCD recieves data, it uses normal DES/CBC mode (xor after DES), and the card uses normal DES send mode when sending data (xor before DES).

DESFire encryption:
Send encrypted data Recieve encrypted data
PCD (DECRYPT) DES/CBC “send mode” Normal DES/CBC “recieve mode”
Card (ENCRYPT) Normal DES/CBC “send mode” DES/CBC “recieve mode”

The last 2 modes are useful if you need to communicate with a DESFire card through PC/SC, or you need to emulate DESFire on Java Cards.

Native Wrapped command style:

In this mode, native commands are wrapped inside iso7816 style APDUs.

The mapping is done as follows:
cls ins          p1 p2 lc [data] le
90  [native ins] 00 00 lc [data] 00

SW1 SW2
91  [native status code]
Wrapped version of the commands shown above:
--> 90 60 00 00 00 00
<-- 04 01 01 00 02 18 05 91 af
--> 90 af 00 00 00 00
<-- 04 01 01 00 06 18 05 91 af
--> 90 af 00 00 00 00
<-- 04 28 3b 61 5b 1b 80 8e 64 55 61 10 05 06 91 00
--> 90 6a 00 00 00 00
<-- 91 00
--> 90 5a 00 00 03 00 00 00 00
<-- 91 00
--> 90 6f 00 00 00 00
<-- 91 9d
--> 90 45 00 00 00 00
<-- 0f 01 91 00
--> 90 64 00 00 01 00 00
<-- 00 91 00
--> 90 0a 00 00 01 00 00
<-- a2 be cd 03 d8 46 cb 33 91 af
--> 90 af 00 00 10 b0 cc bc ed 8f c8 38 c9 08 dc e2 4d 86 ca ec 3c 00
<-- 76 73 d9 49 71 3f f2 d1 91 00

The last mode is the iso7816 command set mode:

Full support for these commands require DESFire v1.3 (EV1)
ISO SELECT (A4)
ISO GET CHALLENGE (84)
ISO EXTERNAL AUTHENTICATE (82)
ISO INTERNAL AUTHENTICATE (88)
ISO READ BINARY (B0)
ISO UPDATE BINARY (D6)
INS READ RECORDS (B2)
ISO APPEND RECORD (E2)

As you can see, not all functions are available using the iso7816 command set. If you need more functions, you must use native or native-wrapped mode.


Nokia 6212: Unlocking the Secure Element

In order to install your own Java Card Applets on to the Nokia 6212 Secure Element (SE) you will need to either talk to the TSM (Trusted Service Manager)(Venyon is the TSM for Nokia phones), OR, you can permanently unlock the SE by using Nokia’s UnlockMidlet (You will need to register to download. Registration is free).

First some warnings:

  • The unlock operation is PERMANENT, and cannot be undone.
  • After unlocking, no TSM will ever trust your secure element anymore, EVER (because you and other people now have access to the default keys).
  • If authentication fails more than 1o times in a row, the card manager will be locked, and you will not be able to install or delete any Applet to/from the SE.
  • Unlocking should only be performed if you want to use your phone for development or testing purposes.

You have been warned!

The UnlockMidlet establishes a secure (encrypted) connection between your SE and a Nokia server. The server will then communicate with your SE and set keyset 42 to the default keys (MAC/ENC/DEK = 404142434445464748494a4b4c4d4e4f), and the Mifare card emulation authentication keys (both key A and B) to FFFFFFFFFFFF.

Step by step:

  1. Download UnlockMidlet
  2. Upload to phone, using either bluetooth or micro-USB cable (in PC Suite mode)
  3. Make sure your phone is configured to use (GPRS) packet data (Settings -> Configuration -> Preferred access pt.)
  4. Start the UnlockMidlet.

At this point the unlock operation might fail due to “No Server Connection” (at least that happend to me). No matter how I configured the packet data settings, the UnlockMidlet always failed with “No Server Connection”.

However, there is another solution to unlock the SE, by using the SDK Emulator and a OmniKey Cardman 5321 reader:

  1. Download UnlockMidlet
  2. Download Nokia 6212 SDK (Requires registration. Registration is free).
  3. Get yourself a OmniKey Cardman 5321 Reader
  4. Download OnmiKey PCSC Driver, Synchronous API and Diagnostics Tool
  5. After installing the OmniKey software, run the Diagnostics Tool, and confirm that there is an ‘API’ tab listing “scardsyn.dll” (this dll is required when using this reader in the Nokia SDK).
  6. Run SDK ‘Emulator’, and in the Phone window, open the file menu and load the unlock midlet.
  7. In the Emulator window, drag and drop the cardman reader from “External Readers” to both 1: “Embedded Tag” and 2: “Embedded Smart Card”.
  8. On the Nokia 6212 phone, go to NFC settings and make sure “cards availability” is set to “always”.
  9. Place the 6212 on the OnmiKey reader, (lay it down on the reader and let it stay there until the unlock operation is completed).
  10. Proceed with the unlock operation in the midlet emulator.

Assuming the unlock operation was successful, you will now be able to install your own Java Card Applets using for example GPShell or GPJ (a pure java version).


Nokia 6212 with NFC

NFC (Near Field Communication) is predicted to be big business in mobile devices in the coming years. Actually, it was supposed to start this year, but there are still only a few select phones out there with NFC.

Nokia 6212 is one such device.

Nokia 6212 Classic

What is NFC?

In short, NFC is a specification which lets you read and emulate tags and smartcards conforming to certain contactless standards.

What can you do with NFC?

  • Use your phone as a contactless credit card (VISA/MasterCard etc)
  • Transfer data between NFC devices
  • Quickly configure other highspeed connections like bluetooth for faster transfer (bluetooth set-up is slow)
  • Payment on public transportation
  • One-time transfer token (on airports between check-in counter and gate)
  • “geo-tagging” (more on this later)
  • Read epassports (biometric passports)
  • Advertising (get additional info about a product, like url etc)
  • Log on to Dell laptops with embedded contactless reader using card emulation mode. (Reads CSN/UID only).
  • Generic reader device for ISO14443-4 smartcards
  • Generic ISO14443-4 A card emulation device
  • Read NFC Forum specified tags (Mifare Classic/DESFire/Ultralight, Sony Felica, and more)
    …and more…

(*Availability of any particular service might require support by the relevant service provider. Also, the service provider might need to have some kind of application available that you can download on your mobile phone, and use as a payment token.)

Can you use NFC features in own applications?

Yes, the 6212 can run Java MIDlets, and supports the JSR257 Contactless Communication API.
Applications can register to handle tag data by type. Phone reads tag and determines if/what app to launch (Applications registers in the “PushRegistry” what tags it wants to handle)

What tags can 6212 read out of the box?

If no Java application is running, the phone tries to handle content using it’s built in native NFC app.
The native NFC application can detect NDEF “Smart Poster” formatted tags. Here is what happends when the native NFC support detect an unsupported tag:
http://www.youtube.com/watch?v=SDQSRpS46Fo
Other tags can be read by using custom Java Applications that are started manually or registered in the PushRegistry to start when a specific tag is detected.

Can the 6212 read ISO15693 tags?

No, the NFC controller inside 6212 (NXP PN512) does not support the ISO15693 standard. The NFCIP-2 recognizes that ISO15693 tags exists, but there is nothing in the NFC specs that says NFC devices must support reading 15693 tags. However the new NXP PN544 controller will add support for ISO15693. It remains to be seen if Nokia will make it possible to use this feature through their JSR257 extensions.

How do you install applications on the 6212’s smartcard emulator?

The smartcard emulator is called a “Secure Element”. The SE in 6212 is a NXP chip with JavaCard OS and GlobalPlatform support. The OS is provided by Giesecke & Devrient. In addition to the JavaCard, the chip also supports Mifare 4k emulation. In order to install applications on to the JavaCard you need to use the Global Platform application (also called the Card Manager). This application is pre-installed in the JavaCard, and is responsible for installing and deleting other applications on the card. The Card Manager is protected by encryption keys, and these encryption keys are only known to a Trusted Party. If your bank wants to install a VISA card on your NFC phone, that bank has to sign agreements with a Trusted Service Manager (TSM). The VISA application will then be transferred in encrypted form from the Trusted Party to the Secure Element. This is called a trusted provisioning path. So, in the phones default state, you cannot install your own applications on the SE. However there is an Unlock Midlet available from Nokia that resets the keys on the SE to default keys. However, this unlock operation is permanent, and you will not be able to install official credit card applications etc on to the SE after it has been unlocked.

Demos

Here are a few clips demonstating some usecases for NFC enabled phones:
http://www.youtube.com/watch?v=fXdWd2i6v-8
http://www.youtube.com/watch?v=jl9uTsjRF6c

Performance

The 6212 has some problems reading cards like MiFare DESFire and generic ISO14443-4 cards when the card is held agains the back side of the phone. However, this works quite well when holding the card against the front side of the phone.

What’s in inside a NFC phone?

See this excellent diagram by Enrique Ortiz:
http://public.cenriqueortiz.com/nfc/elements-nfc-jan2009-CEnriqueOrtiz.jpg

What’s next?

The Nokia 6212 Classic might be the last phone from Nokia with a dedicated Secure Element. In the new model 6216, the SIM card will act as the Secure Element, and content providers must sign agreements with the mobile carrier (since they own the SIM cards), in order to install applets on to the SIM.

Links:

http://mulliner.org/nfc/feed/collin_mulliner_25c3_attacking_nfc_phones.pdf
http://www.mulliner.org/nfc/
http://discussion.forum.nokia.com/forum/forumdisplay.php?f=144
http://www.forum.nokia.com/forum/showthread.php?p=555103
http://weblog.cenriqueortiz.com/touch-nfc/
http://public.cenriqueortiz.com/nfc/elements-nfc-jan2009-CEnriqueOrtiz.jpg


Listing available PC/SC terminals

In a followup to my post on the Dell embedded contactless smartcard reader, here are some simple methods you can use to list the available PC/SC terminals on your system.

Choose one of the following:

  1. Java (Windows + Linux):
    Make sure you have (Sun) Java 6 JDK installed
    (Note: Other JDKs might also work, but not all support the javax.smartcardio API)
    (On Linux distros you might have to do this to make it work)
    Compile and run the following little program:
  2. 
    import javax.smartcardio.CardTerminal;
    import javax.smartcardio.TerminalFactory;
    /**
    *
    * This program lists the available
    * PC/SC terminals on the current system
    */
    public class PCSCTerminals {
        public static void main(String[] args) throws Exception {
            TerminalFactory factory = TerminalFactory.getDefault();
            for (CardTerminal terminal: factory.terminals().list()) {
                System.out.println("Terminal: " + terminal);
            }
        }
    }

    Here’s the output when executed on my Dell Precision M6400:

    Terminal: PC/SC terminal Broadcom Corp Contacted SmartCard 0
    Terminal: PC/SC terminal Dell USB Reader 0

    That last terminal is the SIM card reader in the Dell WWAN 5530 HSDPA (“Turbo” 3G) card.

  3. Native Smartcard program (Windows):
    For example Scriptis EMV Explorer Tool
    This program is used to explore an EMV card (VISA, Mastercard etc smartcard), but can also be used to list PC/SC terminals.
  4. Mac ?

Design error in javax.smartcardio?

I just hit a problem that makes me believe there is a bug or design error in javax.smartcardio.

When SmartcardIO recieves the procedure bytes 61xx, it issues a GET RESPONSE-command with the class byte from the previous “main” command. This conflics with the EMV specifications (and possibly also the ISO-7816 spec).

Here’s my problem:

When you send commands to an EMV card, the card usually responds by sending procedure bytes (SW1SW2 = 61xx or 6Cxx). These bytes should (according to 7816 and EMV spec) be handled by the TTL (Terminal Transport Layer, eg the smartcardIO API), and not by the TAL (Terminal Application Layer, eg your own code).
And smartcardio does this. So far so good. But the problem occurs when I issue the EMV command “GET PROCESSING OPTIONS”.
This command has CLA=0x80 and INS=0xA8. When the TTL (that is, the smartcardio API) recieves the procedure bytes 61xx from the card, SmartcardIO issues the GET RESPONSE command with CLA=0x80 and INS=0xC0, however the EMV specs clearly states that this command must use CLA=0x00. So in other words, SmartcardIO uses the CLA from “GET PROCESSING OPTS” (the main command) when issuing the GET RESPONSE command. Some EMV cards ignore the value of the CLA-byte at this stage, but others are not so forgiving.

Look here at lines 198-210

I’ve tried reading the 7816-4 specs about the GET RESPONSE-command,
but it doesn’t state specifically that the GET RESPONSE command should use the CLASS byte from the previous “main” command.

I’m considering submitting this to Sun as a bug.

Am I missing something, or is this a design error in smartcardio?


Dell embedded contactless smartcard reader

Updated (2009-10-13): How to enable PC/SC support for this reader.

I recently bought a Dell Precision M6400 Covet. One of it’s cool standard features is the embedded contactless smartcard reader. This reader is located under the right palm rest, and is also available on select Latitude E-series. All this is cool, but, where is the documentation? What cards does it support? Can I access the reader from my own programs? Unfortunately Dell seems to have very little information available on their web pages, so I had to start digging myself. (I’m the type of guy who can’t have a gadget in my house without knowing what’s inside, who made it, and how can I use it in strange ways to do cool things.)

The chipset is Broadcom BCM5880, and is listed under Device Manager as “Broadcom Unified Security Hub CV w/fingerprint sensor”. There is no separate entry in “Device Manager” for “Contactless Smartcard reader”. This chipset also contains a secuity processor, contacted smartcard support, fingerprint reader support, TPM v1.2, and a so-called “credentials vault” (CV).

From BCM5880 Product Information:

“The Broadcom BCM5880 secure applications processor combines platform identification, personal identification and data protection in a single chip and includes an integrated Trusted Platform Module (TPM) 1.2 device, as well as the credential “vault” capability. It also integrates many of the authentication applications available today, such as one-time-password (OTP), fingerprint readers, smart cards, and contactless readers, into silicon, where they all can be centrally managed and utilized as part of multi-factor authentication policies”.

On a side note: Many of the same features available in the TPM is also available in the Credentials Vault. The biggest differences seems to be that CV is enabled by default, but TPM must be manually activated in BIOS (according to the requirements by the Trusted Computing Group). The TPM interface is standardized, while CV is not? Also, when authenticating to the chip (updates/modifications etc), the TPM only supports passwords, while CV supports smartcards and fingerprints as well.

Anyway, through HID Global I found a document called “Dell E-Family PBA Enrollment Application Notes AN0124” which lists the compatible card technologies for this reader:

Dell Compatible Card Technologies Table

From this table we can see that the embedded contactless reader “natively” supports HID iClass cards (in software/hardware), it does NOT support 125kHz proximity cards, and the rest of the cards (MIFARE and generic ISO14443A/B or ISO15693) are supported by means of reading the CSN/UID only. Since the CSN should be unique, this means all ISO14443A/B or ISO15693 cards, eventhough not directly supported by the Dell software, will still work with the embedded reader through the use of the Card Serial Number. But be aware, the CSN can be read by anyone, and the communication between the card and reader is unencrypted, unlike the iClass cards, where the reader and card first goes through a mutual authentication process, before the identification number is read from secure memory, and then finally transmitted in encrypted form to the reader. The encryption and mutual authentication process uses HID iClass’ Standard Master Key. This key is then diversified using the CSN, to create a unique key that is stored in each iClass card. The Standard Master Key is stored in secure memory in all authorized iClass readers. (When it comes to the Dell laptops, my guess is that this Standard Master Key is stored securely in the reader itself or the Credentials Vault).

I have tested several different HID iClass cards, 2k2, 16k2, programmed and unprogrammed, and NXP Mifare 4K, Mifare Ultralight. They all seem to work fine with the embedded contactless reader. (Although the ultralight card is not read as easily as the other cards. I had to move the card over the reader for a few seconds before it was detected). On the unprogrammed iClass cards, I suspect that it reads the CSN only, as the length of the “Access Control ID” bytes are set to 0x00, which means there is no number stored on the card. Unfortunately, the enrollment software on the Dell Laptops does not inform you weither the card you enrolled was an iClass card, or just a generic card with CSN/UID, so there is no way to know what number was actually used. I also tried with a iso14443b java card, but it was not detected by the reader, even though the table above says the reader supports the 14443 ‘B’ protocol.

I bought most of the cards from http://www.smartcardfocus.com.  They sell individual cards, unlike most other stores who only sell batches of 100/200 etc.
Any of the iClass cards they have will work, but they are all supplied unprogrammed by default. Eventhough unprogrammed cards will work with your Dell contactless reader, you might want to ask them to program the cards for you using their free programming service, as I’m not sure if it actually reads some default ID from secure memory, or just uses the CSN because the card is not “activated”.

Using the card on your Dell laptop:
Enroll the card through “Dell Security Manger” or “Wave Embassy Security Center”. Be aware when logging in: Do NOT use the numpad when entering PIN on pre boot. The numpad keys do not work correctly, and will result in “Auth Failed”.

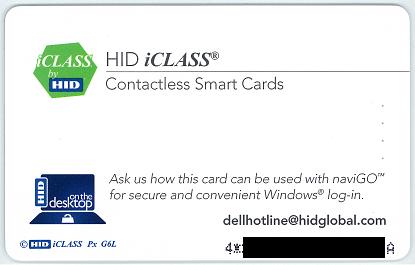
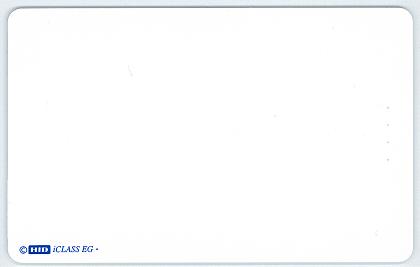
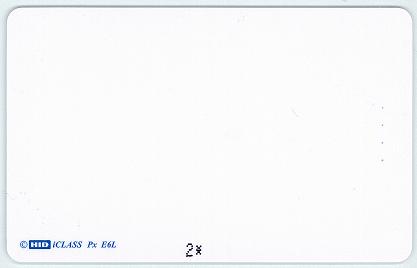
Here are scans of some of the cards I have tested:
(I have removed the external serial numbers where they appear)

HID Dell PBA testcard (front)
iclass-prox-latitude-testcard-front

HID Dell PBA testcard (back)
iclass-prox-latitute-testcard-back-cut-resized-anonFrom the markings on the card (“iCLASS Px G6L”) we can see that this is a dual technology card (HID iClass 13.56MHz + HID Prox 125kHz).

iClass 2K 2 app (ISO 15693 only) iclass-2k2-cut-resized-anonMarkings: “iClass DL + [external serial #]”

iClass 2k2 + Prox
iclass-2k2-prox-cut-resizedMarkings: “iCLASS Px D6L”

iClass 16k2
iclass-16k2-cut-resizedMarkings: “iCLASS EG”

iClass 16k16 + Prox
iclass-16k16-prox-cut-resizedMarkings: “iCLASS Px E6L”

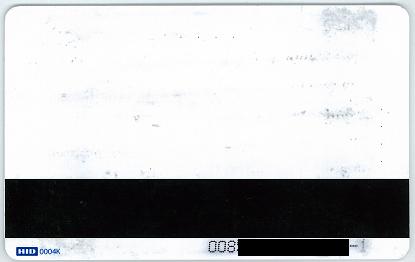
This is the card I use to access the building where I work, a HID DuoProx 125kHz + magnetic strip combo:
duoprox-cut-resized-anonThe markings say (“HID 0004k”). The front is all white.
This card will not work with the Dell contactless reader, but you can get dual technology cards that have both iClass and Prox, so you can use the same card to access buildings and your computer.

All iClass cards supports both ISO14443/B2 and ISO15693, except the 2k2 versions which only support ISO15693. However, unfortunately, iClass cards only supports up to ISO layer 2, and this makes iClass reader support pretty slim, since they can only be read by readers that are specially prepared for iClass cards (usually only HIDs own readers, like HID or OmniKey, and some other licenced readers).

PC/SC support
I have previously experimented with reading EMV cards (see saush’s excellent example here) with the embedded contacted reader, so it would be nice if I could use the contactless reader in the same way. However the reader is not listed when I enumerate the available PC/SC terminals on my system.
In the last section of this document:
http://www.hidglobal.com/documents/dell_latitude_security_broch_en.pdf
it is stated that the contactless reader supports PC/SC… I have contacted Dell ProSupport, but they could not give me an answer. I will try to contact them again soon.
It seems for now, the reader can only be used by supported Dell software.

Update (2009-10-13): I finally found the solution to enable PC/SC support for this reader.

——

Many of the contactless cards use so called number “formats” (or “encoded numbers”). All HID iClass and Prox cards use this.
This number is different from the CSN/UID (which is unique to the chip), and is stored in the card EEPROM. On iClass cards, this number is stored in the HID Application Area, and is protected by the HID Standard Key (or a custom key in some cases).

A “Format” is simply the way you interpret a number.
For example given the number: 56128902

One “Format” can be:
Facility Code = 56
Card ID = 128902

Another one can be
Facility Code = 5
Card ID = 6128902

A format also specifies how long a number can be, for example 26, 34 or 36 bits etc.

H10301 – standard 26-bit format (original wiegand format) This format is supported by almost all contactless smartcard/proximity systems.
facility code 1-255
card id number 1-65535
= total 16,711,425 ( 24bit)  (facility code ‘0’ and card id ‘0’ not allowed)

When using the Dell reader with iClass cards, what formats does it support?
I would guess the reader is format agnostic. It doesn’t care about the format, it just reads the complete number, weither 26/34/36/37 or 84 bits, the reader just sees a large number.

Understanding card data formats (the id numbers stored on cards):
http://www.hidglobal.com/documents/understandCardDataFormats_wp_en.pdf

Format Guidelines:
http://www.hidglobal.com/page.php?page_id=10

Format and Facility (Site) Code explained:
http://www.identisource.net/format_and_facility_codes_expl.cfm

Custom Wiegand formats:
http://paxton.co.uk/docs/Application%20notes/AN1010.pdf

FIPS approval for the BCM5880:
http://www.fips201.com/product/view/418

The chip manufacturer for HID cards:
http://www.insidecontactless.com/products/picopass_suite.php

—–

Other links:

http://forum.notebookreview.com/showthread.php?t=354498
http://en.community.dell.com/forums/t/19277980.aspx
http://www.hidglobal.com/iclass

Glossary:

CSN = Card Serial Number. A unique number burnt into the chip at production. Same as UID.
UID = Unique ID. Same as CSN.
Access Control ID = The “encoded number” stored in the HID Application Area on iClass cards.
Encoded number = another name for the Access Control ID